Last summer, we watched our neighbor pull her garlic three weeks too early, ending up with tiny bulbs that wouldn’t store past August. We’ve learned that timing garlic harvest isn’t just about waiting for brown leaves—there’s a sweet spot that separates disappointing mini bulbs from those magnificent, papery-wrapped globes that’ll keep us cooking all winter long. Miss this window, and months of careful tending can unravel in a single hasty afternoon.
Key Takeaways
- Harvest when 3-4 lower leaves turn yellow/brown while top 5-6 leaves remain green (30-50% foliage yellowed).
- For hardneck varieties, harvest 3-4 weeks after scapes appear and curl into tight loops.
- Stop watering days before harvest, then use a spading fork to gently lift bulbs from below.
- Test harvest one bulb to confirm well-formed cloves with papery wrappers before harvesting the entire crop.
- Avoid harvesting too early (undersized cloves) or too late (bulbs split underground from overdrying).
When To Cut Garlic Scapes For Maximum Bulb Growth
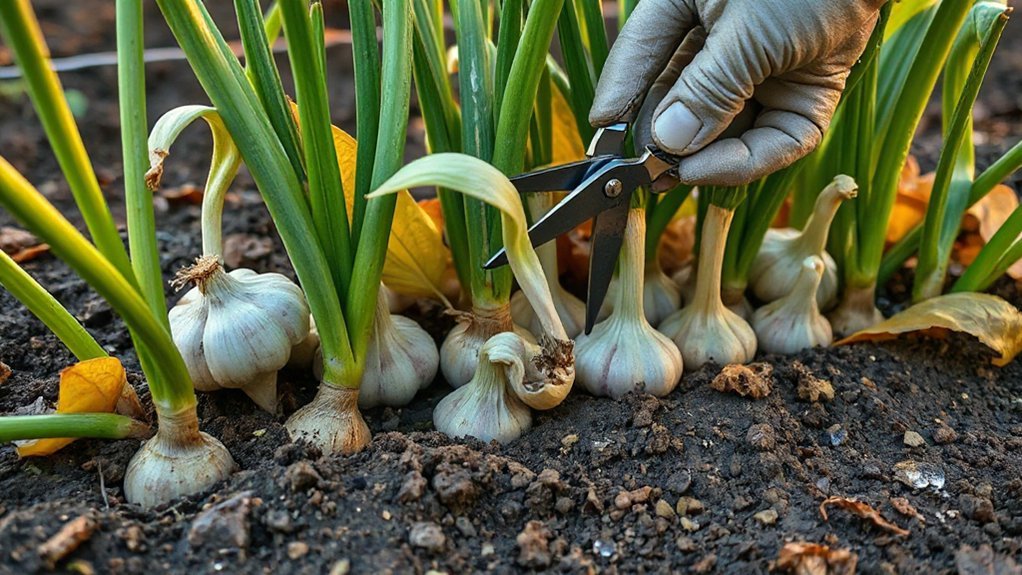
When those curly green scapes start popping up from your hardneck garlic like nature’s own question marks, it’s time to grab your scissors and make a choice that’ll make or break your bulb harvest. We’ve learned the hard way that timing’s everything here—cut ’em when they first curl into that tight loop, not a day later. Once those scapes straighten out, they’ll turn woody and bitter, stealing precious energy from your developing bulbs underground. We always snip them right at the base where they emerge, using clean scissors. This simple act redirects all that plant power into swelling those bulbs we’re really after. Do this about three to four weeks before harvest time.
Hardneck Vs Softneck: Timing Differences By Garlic Type
Now that we’ve talked about cutting scapes, let’s explore how hardneck and softneck garlic march to different drummers when it comes to harvest timing. The biggest difference is that hardnecks give us that handy scape as our four-week warning bell, while softnecks keep their secrets and make us read their leaves like tea leaves to know when they’re ready. We’ll also find that these two types don’t necessarily finish their growing season at the same pace, which means we can’t treat them as one-size-fits-all in our harvest planning.
Scape Production Differences
Since hardneck and softneck garlic behave like two different relatives at a family reunion, understanding their scape habits will save you plenty of guessing games come harvest time.
Hardnecks reliably send up woody flower stalks called scapes around June, giving us a clear harvest countdown. Meanwhile, softnecks keep their intentions hidden, rarely producing noticeable scapes.
Here’s what we’re watching for:
- Hardneck scapes emerge curly – harvest them at this tender stage before they straighten and turn bitter
- Softnecks stay quiet – most varieties won’t give you the scape signal
- Timing matters – scapes appear 3-6 weeks before bulbs mature
- Energy redirection – removing scapes pushes hardnecks to focus on bulb development
We’ll use scape appearance as our regional readiness gauge for hardnecks, while relying on leaf dieback for those mysterious softnecks.
Harvest Window Variations
Typically, hardneck and softneck garlic march to completely different drummers when harvest season rolls around, which means we can’t treat them like identical twins in our timing strategy.
Hardnecks give us that beautiful scape cue—we simply harvest about a month after those curly stems emerge in late spring. It’s nature’s own calendar, reliable as sunrise in northern gardens where these varieties thrive.
Softnecks play by different rules entirely. Without scapes to guide us, we’re watching for foliage signals—counting down as lower leaves brown while keeping an eye on those upper five or six green leaves. They often ripen anywhere from late June through July, depending on variety and location.
The key? Let your garlic type tell you when it’s ready rather than forcing them into rigid calendar dates.
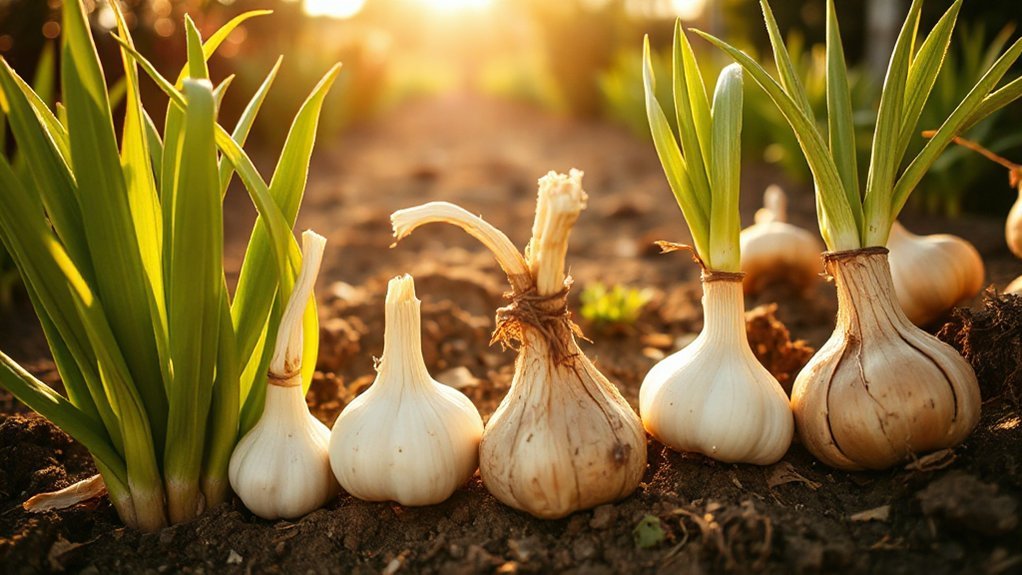
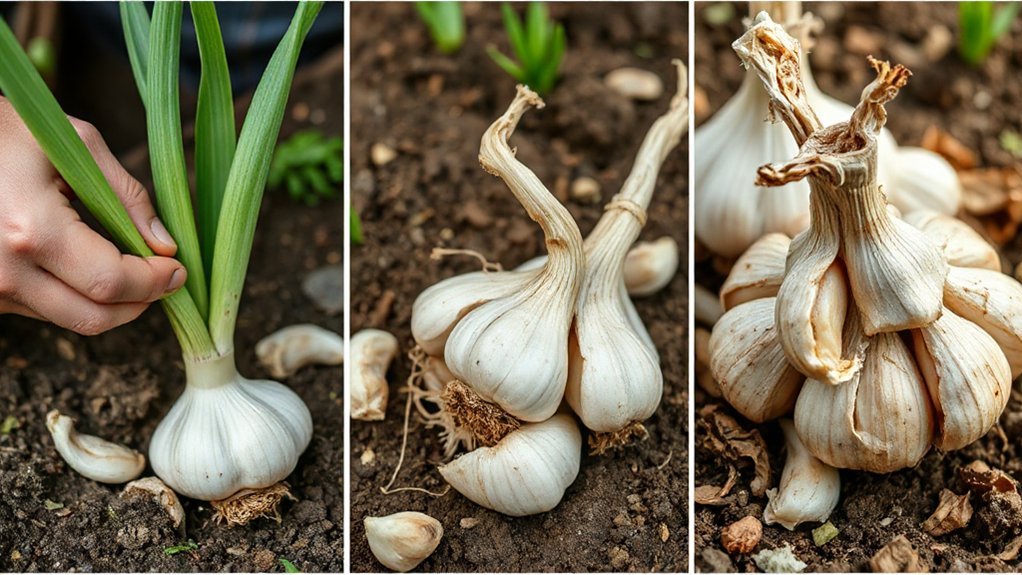
When Garlic Leaves Turn Yellow: Your Harvest Window Opens
When those bottom garlic leaves start sporting their autumn colors—turning yellow and brown while the top handful stay stubbornly green—you’ve hit gardening gold. This mixed-color stage opens your harvest window, and timing matters more than you’d think.
Here’s what we’re looking for:
- 3–4 dead leaves (about 30–50% of foliage yellowed)
- Top 5–6 leaves still green and standing proud
- Hardneck varieties: 3–4 weeks after scapes appear
- Test bulb confirmation: well-formed cloves with papery wrappers
Don’t wait until everything’s brown—that’s rookie territory. Pull a test bulb to check development. You want distinct shoulders and tight cloves, not separating ones. This sweet spot guarantees proper curing and storage life.
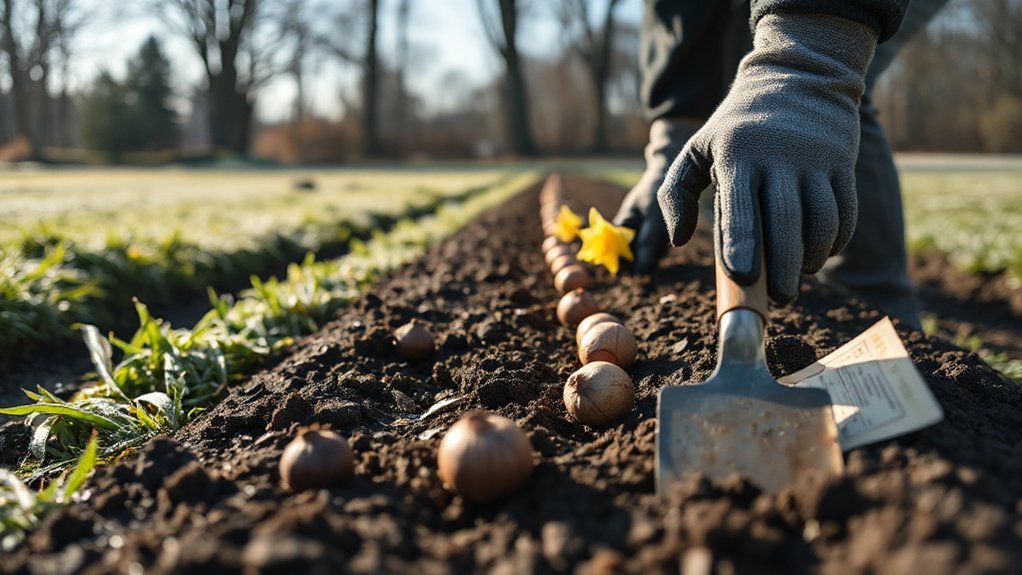
Step-By-Step Garlic Harvesting Technique Without Damage
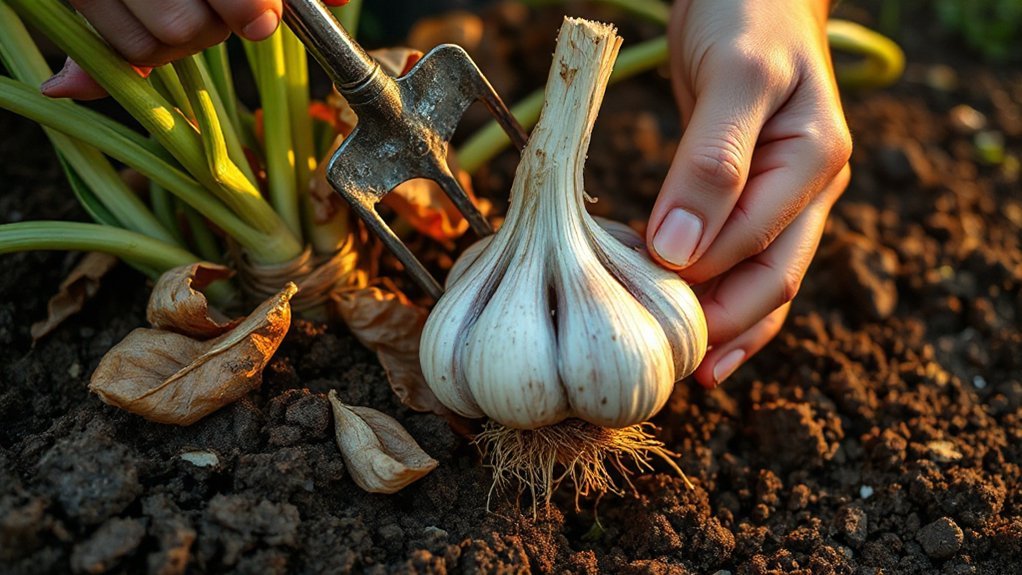
Digging up garlic requires the patience of a treasure hunter and the gentle touch of a midwife—because one wrong move can turn months of careful growing into a pile of nicked, storage-doomed disappointments.
| Step | Action |
|---|---|
| 1 | Stop watering days before harvest until soil crumbles |
| 2 | Insert spading fork 4-6 inches from rows, lever up gently |
| 3 | Lift bulbs from below—never yank stalks |
| 4 | Shake off dirt by hand, keep papery wrappers intact |
We’ll nudge each plant upward until we can grasp the neck and ease it free. Leave those roots and 6-9 inches of stem attached—they’re nature’s protective armor during curing. Sort out any damaged heads for tonight’s dinner rather than storage.
What Happens If You Harvest Garlic Too Early Or Too Late?
Like Goldilocks searching for the perfect porridge, we’re hunting for that sweet spot between too early and too late—because garlic won’t forgive poor timing.
Just like Goldilocks’ porridge, garlic harvest timing must be absolutely perfect—too early or late spells storage disaster.
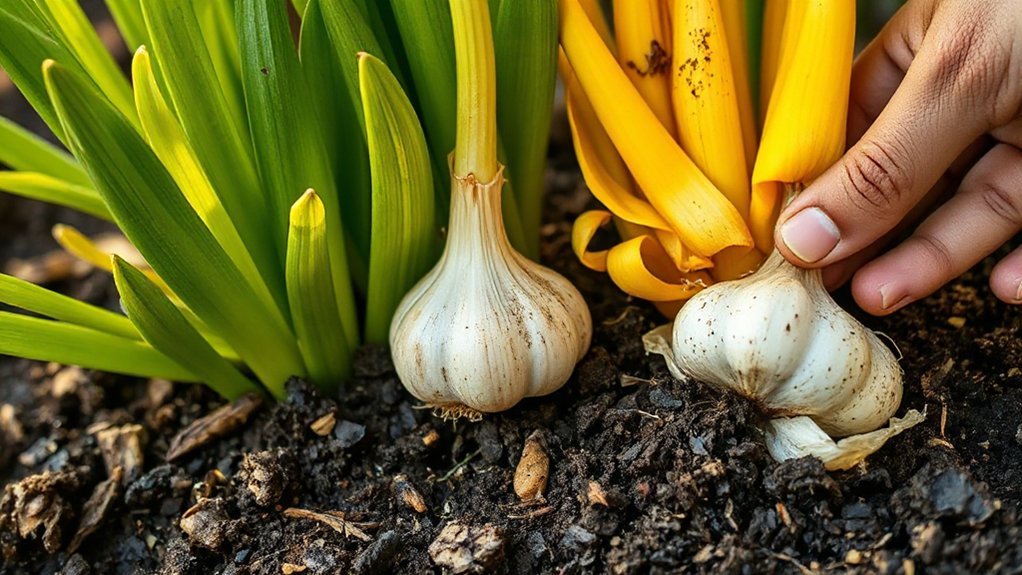
Jump the gun too early, and we’ll end up with disappointing runts that haven’t finished filling their skins. These undersized bulbs come with flimsy wrappers that won’t protect our harvest through storage season.
Wait too long, and we’re facing a different disaster—overripe heads where cloves break free from their bulbs, destroying that vital protective barrier.
Here’s what timing mistakes cost us:
- Early harvest: Undersized cloves with thin, fragile outer wrappers
- Shortened storage life from immature bulbs that deteriorate quickly
- Late harvest: Separated cloves prone to rot and sprouting
- Handling damage from compromised protective wrappers
We can’t store damaged garlic long-term—it needs immediate use or processing.
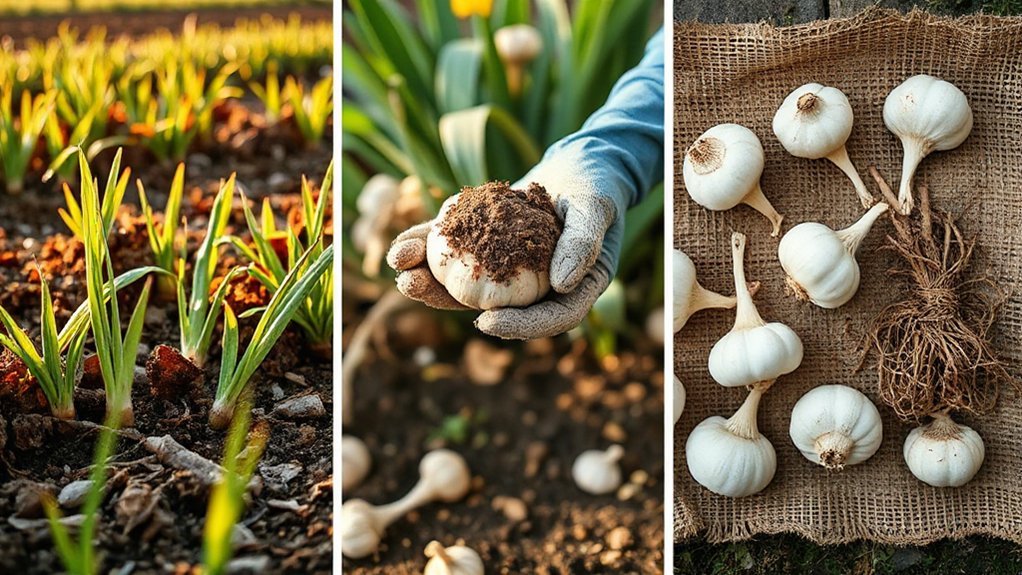
How To Properly Cure Freshly Harvested Garlic Bulbs
Now that we’ve harvested our garlic at just the right time, we can’t simply toss those precious bulbs into storage and call it done. The secret to garlic that’ll last through winter and beyond lies in properly curing those freshly dug bulbs—getting the environment, timing, and storage just right. Let’s walk through how to transform your harvest into perfectly preserved garlic that’ll make your kitchen sing all season long.
Optimal Curing Environment
Once we’ve pulled our garlic from the earth, the real magic happens in those first few weeks of curing—and where we do it matters more than you might think. Creating the perfect environment means finding that sweet spot where nature does her work without interference from mold or rot.
Here’s what we’re aiming for:
- Temperature range of 60–75°F with good ventilation—think covered porch or airy shed
- Low humidity below 60% to keep those papery skins crisp and clean
- Single-layer arrangement on screens or hanging braids for maximum airflow
- Shaded location away from direct sun that’ll bleach our precious bulbs
We’ll know we’re successful when those necks tighten up and the whole bulb feels firm after 3–8 weeks.
Duration And Storage
After we’ve set up that perfect curing spot, patience becomes our greatest virtue—and let me tell you, those first weeks feel like watching paint dry when you’re anxious to taste your homegrown treasure.
We’ll cure our bulbs for 3-8 weeks until they’re completely dry with papery skins. Once properly cured, we trim roots and tops, leaving one wrapper intact while removing loose, dirty layers.
| Storage Type | Temperature | Duration | Notes |
|---|---|---|---|
| Softnecks | 32-40°F | 6-8 months | Can be braided |
| Hardnecks | 32-40°F | 3-4 months | Lasts longer if colder |
| Minced/Frozen | Freezer temp | 6+ months | Portion before freezing |
| Seed Stock | 32-40°F | Until fall planting | Save largest bulbs |
Store in cool, dark, well-ventilated spaces for maximum shelf life.
Where To Store Cured Garlic For Long-Term Freshness
Where’s the best spot to tuck away all that beautiful garlic we’ve worked so hard to cure? Finding the perfect storage location is like securing your homestead’s treasure—it needs just the right conditions to keep those bulbs fresh for months.
We’ll want to scout out a cool, dark corner that stays between 32–40°F with good airflow. Think root cellars, unheated garages, or that perfect pantry spot away from heating vents.
Here’s what makes the ideal garlic hideaway:
- Cool and consistent temperatures (32–40°F) without wild swings
- Good air circulation to prevent moisture buildup and rot
- Moderate humidity around 60%—not bone dry, not swampy
- Darkness to keep those cloves from sprouting prematurely
Skip damp basements and stuffy closets—they’re garlic’s worst enemies.
Common Harvest Mistakes That Ruin Your Garlic Crop
Even though we’ve put months of love and care into growing our garlic, it’s heartbreaking how quickly we can sabotage all that hard work with a few simple harvest mistakes. Jumping the gun and pulling bulbs before those bottom leaves brown leaves us with tiny, disappointing cloves that won’t last through winter. But waiting too long until all foliage dies means our precious bulbs split apart underground – what a waste! Yanking them up by the stalk without loosening soil first breaks everything apart. Then there’s leaving our freshly dug treasures baking in the sun or piling them up wet, which invites rot faster than unwelcome visitors.
Preparing Your Best Bulbs For Next Season’s Planting
Choosing the right bulbs for next year’s crop separates the seasoned grower from the hopeful beginner – and it starts the moment we pull those beauties from the ground.
We’re looking for nature’s champions – the largest, healthiest bulbs with intact papery skins and zero soft spots or mold. Here’s our selection and storage blueprint:
- Record variety and source from your most vigorous, disease-free plants
- Cure bulbs for 3–6 weeks in well-ventilated shade before storage
- Store in cool (32–50°F), dark, dry conditions with good airflow
- Keep bulbs whole until fall planting – separate cloves only when ready
Don’t separate cloves until planting time, and choose those hefty outer cloves for next season’s biggest harvest. Smart selection today means garden independence tomorrow.
Frequently Asked Questions
When to Harvest Garlic Planted in October in the USA?
We’ll harvest that October-planted garlic around late June through mid-July—roughly 8-9 months after planting. Don’t rely on dates though, friend. Watch for nature’s signals: when those bottom 2-3 leaves turn brown but 4-6 upper leaves stay green, she’s ready. For hardneck varieties, we’ll harvest about 3-4 weeks after removing scapes. Trust the plant’s wisdom over any calendar.
Can You Leave Garlic in the Ground Too Long?
Yes, we can absolutely leave garlic in the ground too long, and trust me, we’ve learned this lesson the hard way! When we wait until all those leaves turn brown, our bulbs become overripe with cloves separating and papery wrappers. They won’t store well either. We’ve found it’s better to harvest when several lower leaves have died but five or six upper leaves stay green.
Can You Eat Garlic Immediately After Harvesting?
Absolutely we can eat garlic straight from the dirt like treasure hunters claiming our prize! That fresh-dug bulb‘s bursting with vibrant, punchy flavor that’ll wake up your taste buds. Sure, the skin’s tender and harder to peel, but we’re not letting that stop us from enjoying nature’s bounty. Toss those juicy cloves into salads, roast them whole, or savor them raw – freedom tastes magnificent.
So
We’ve walked through this garlic journey together, from watching those curly scapes dance in the breeze to pulling up those perfect, papery bulbs. Like our grandparents always said, “Good things come to those who wait”—but not too long! Now you’ve got the know-how to harvest at just the right moment, cure ’em proper, and fill your pantry with homegrown gold that’ll last through winter’s chill.